Bonus Stage 2
Survive 40 waves of open terrain warfare. Use your turrets to block oncoming units and create paths.
The second bonus stage is a little more of a mix between the open space, maze-able terrain of the first bonus mission, combined with more of the “seek proper firing positions” strategies used in the campaign missions. You won’t actually be doing much mazing here until the last portion of the level, and even then only in limited amounts.
This guide will cover how to get a Full House, which is a perfect round with all medals, on the Bonus Stage 2 level of the iBomber Defense Pacific campaign, played on Veteran difficulty. In addition, this mission guide will cover the secondary objective along with a walkthrough video.
Bonus Stage 2: Overview
In this bonus mission, you’re following more of the strategies you learned in the campaign versus the ones you learned in Bonus 1. In particular, you’ll be using the strategy of digging in your turrets, along with constant pausing and repositioning of fire arcs, especially in the first half or so of the mission. This is in order to conserve funds to work towards a max interest gain.
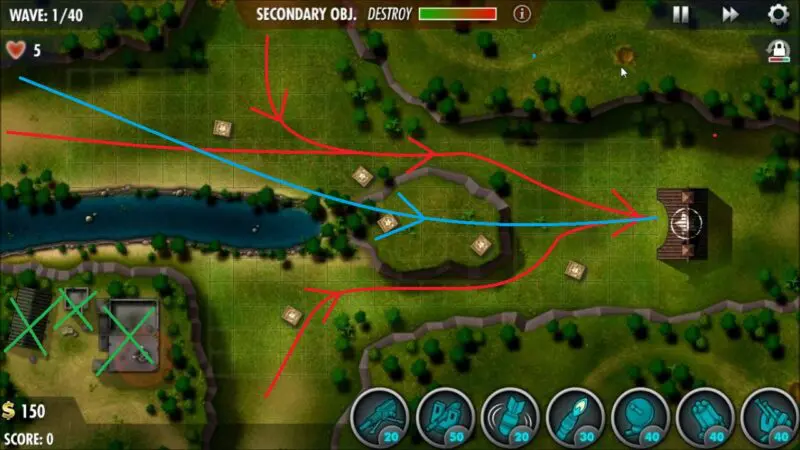
The enemies come in from three different locations, the first being the open section in the bottom-center of the map with the second and third from the top and left opening of the map, although these last two will converge into the same path. What’s most important, however, is where you will be taking these enemies on, which will be the small strips of land that sit above and below the central hill.
Air units will come in from the left and will travel pretty much directly across the middle of the map, towards your base.
This mission is complicated, so if you still feel lost, make sure you check out the video below for a full start-to-finish walkthrough.
Secondary Objective
Destroy the Japanese war factory.
A handful of tightly spaced buildings occupy the bottom left corner of the map, and they must all be destroyed to accomplish the secondary objective in the second bonus mission. The only way you’ll be able to do this is with bombs dropped here and there over the later course of the level—after using them to help take out the one crate your turrets won’t reach.
Supply Crates: 6
You won’t have any perks or upgrades for your turrets in this bonus level, just like the previous one; however, you will have rank 3 of all turrets unlocked, so don’t worry about assigning victory points since you won’t be doing so anyways.
Turret Placement

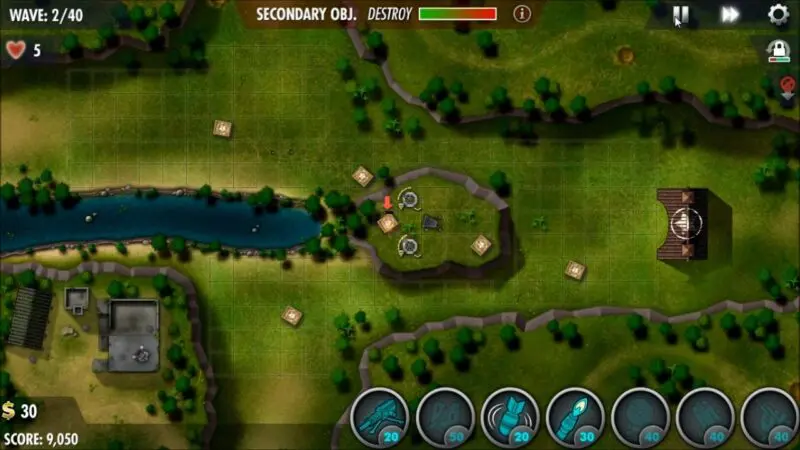
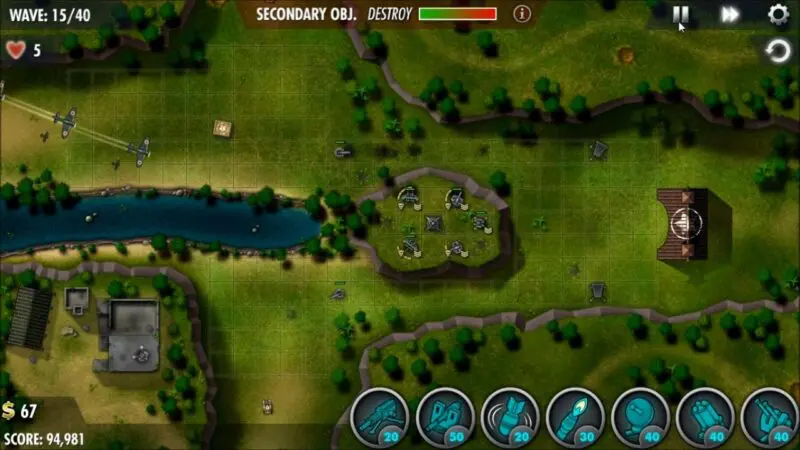
The initial turret setup. Wave 5
Placing your turrets in this mission will be significantly less complicated in this bonus level versus the first, since you don’t really need to maze, and the only actually mazing will come towards the end and be rather simple at that. Your initial focus is going to be filling in the central hill first, then eventually placing a wall of turrets in the large space before your base, funneling the enemies into a single path down the center, which if all goes well, they won’t even reach.
Again, the most important aspect here is digging in ALL of your turrets. In bonus 1, some were left un-dug, whereas here every single one that can, should do so.
Waves 1–10
Starting off, you want to place a pair of level 2 machine guns in the frontal positions of the central hill, dug in with a comms tower in the space that sits in the exact center of the hill, boosting them. You’ll need to start off your quick pause-unpause clickery so that you can use the dug in machine guns to start shooting up the crates that they can reach ASAP. Remember you can have one of the turrets shooting a crate while the other shoots the incoming enemy, by keeping the fire arc of the one you want to defend, off of the targeted crate.
As you get funds rolling in, you’ll want to upgrade the turrets to level 3 so they can take on the vehicles that arrive, starting in wave 3 with the top path.
Anti-Air: You will need a single AA turret at the right side of the hill for wave 7.
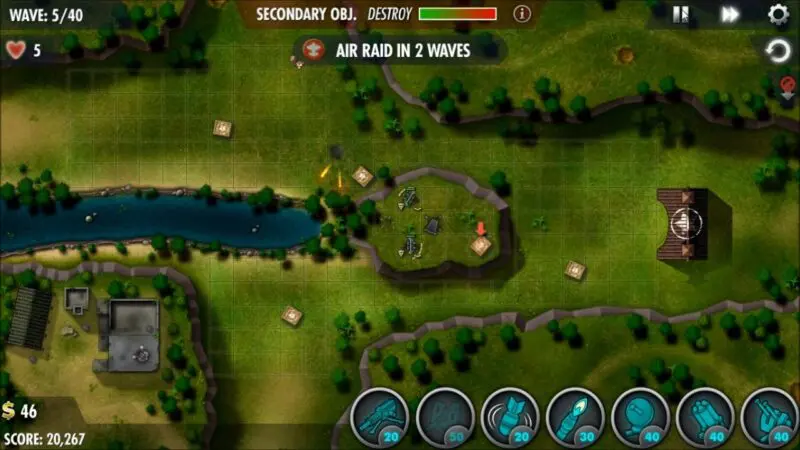
Around wave 8, try to have enough money for your first Cannon, which you’ll of course need to dig in. This will help with the increasing strength of the waves, shooting harder to reach crates and catching enemies that slip past and out of the MG’s range with a quick repositioning. Wave 9 should bring your second Cannon so you have one to cover each path.
Finally try to work over the crate to the top left of your hill so you can clear the space for a flamer turret, as you’ll need two, one each to cover the entrances to the paths that go past your hill. (check the picture)
Waves 10–20
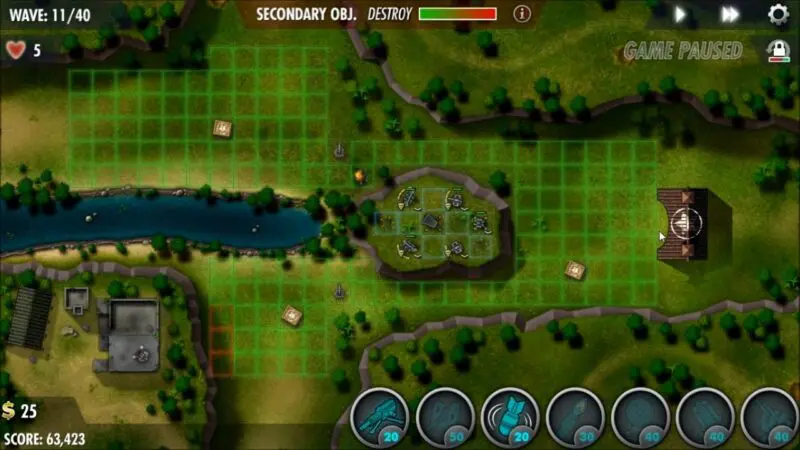
Wave 15 Wave 20
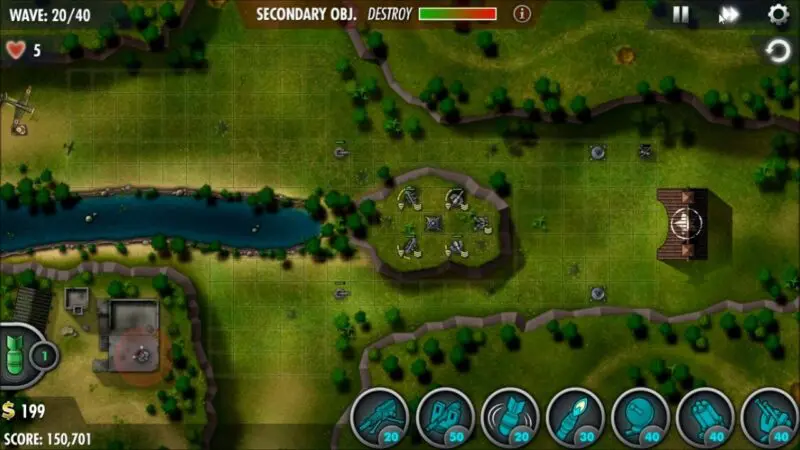
Things here are pretty much making full use of repositioning your fire arcs when necessary and saving up your funds so you can upgrade the comms to level 3, while placing an additional 2 comms to the rear of the map, just outside of your base where they will be able to boost the other turrets you’ll be placing back there later. Then saving up your money till you get around 200 in the bank, so your earning your max interest of 50 every wave.
Anti-Air: Your AA turret will need an upgrade by wave 18 to level 2. It, along with your other hill turrets should also be boosted by max comms by wave 15.
Towards the end of this stretch, around waves 18-19, you’ll need upgrades to level 2 for both of your Cannons, along with placing a single bomb turret, upped to level 2 later on (around wave 30), placed in the top right corner of the map, by your base. You will not need any further bomb turrets or upgrades to it, as long as you get it down around this time.
You will still need to do some serious repositioning, especially towards the end in order to prevent leaks, moving turrets to cover the opposite path, the instant the enemies in their path are destroyed.
Waves 20–30
Wave 25 Wave 30 with the beginnings of the rear defensive line in place.
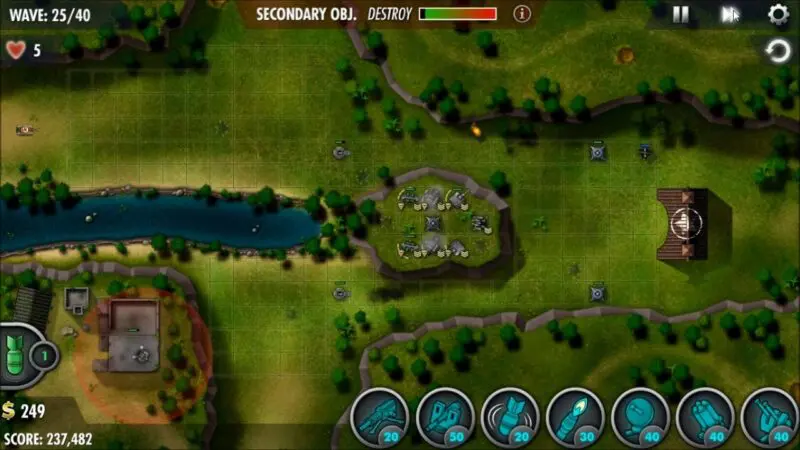
Things are about to get easier, with your earning of more and more interest, and upgrading all comms to level 3, you’ll only need to do a lot of repositioning for the first couple waves of this stretch, before it’ll be time to invest the large influx of funds you’ll now have into upping your Cannons to level 3, then purchasing Rocket turrets for the rest of the spaces on the hill, sans the far left space on said hill. Again, as you purchase these rockets, try to make sure not to dip below 200$ by the wave’s end, while also digging them in and having their fire arcs down the approach of the enemy units.
Anti-Air: Wave 23 will be a good time for you to get the final upgrade to your AA, up to level 3. Leave the space between your two MGs on the hill open for a second AA turret later.
By wave 30, you should have upgraded the flamer turrets at the path entrances, filled in most of the free spaces left on the hill with rockets, and begin working on your row of turrets on the low ground in front of your base. Some flamers at the top and bottom will keep the enemy units slowed, with MGs placed to the side until you’ve filled in the top and bottom 3 spaces, funneling the enemy units into the single path in the middle leading to your base as mentioned above.
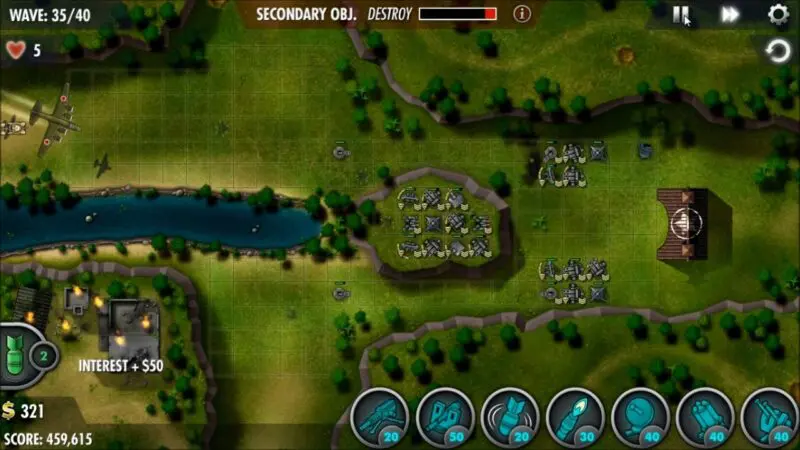
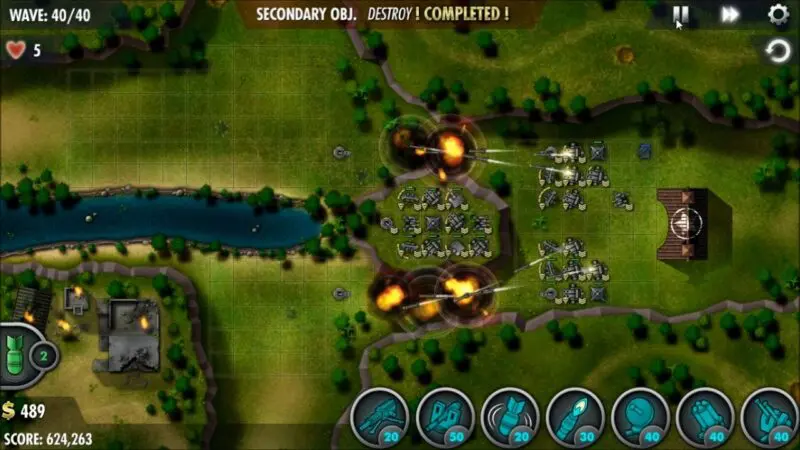
Waves 30–40
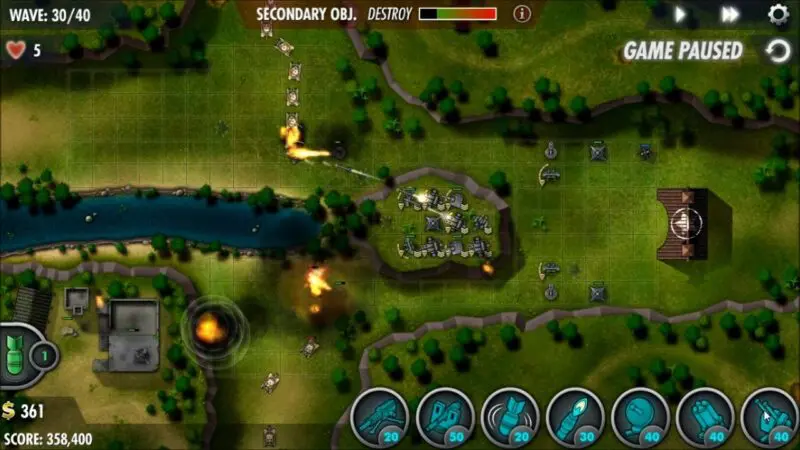
Wave 35 Wave 40
Anti-Air: At the start of wave 30, try to get a fully upgraded AA at the spot mentioned above, between your two MG’s on the hill. At wave 37, build your third and final AA, upgraded immediately to level 3, placed next to your base on the low ground, where it can still be boosted by comms, but won’t occupy a space better served by a Rocket turret.
From here on out, your task is simple, pour funds into the defenses on the low ground near your base, setting up a bunch of Rockets that are dug in behind the wall of MG’s whose main purpose is to block fire for the more delicate rockets. Upgrade your Bomb Turret or build a second if you don’t feel confident you’ll have enough to take out the secondary objective. Either way, you should have plenty of firepower and funds to blow away the enemy tanks while they are still in the tight paths that go around the hill, laid into by hordes of rockets.
Veteran Difficulty Video Guide
Credits
I would like to give a quick shout-out to some of the people who helped contribute information on how to beat this mission, especially for helping others while I worked on getting this guide together.
Whatsupnow
MattL
Ricky
Swissbrick
And anyone else I might not have remembered right away. If I did indeed forget you, please leave a comment and I’ll add your name here.