Santa Cruz: Sea Attack!

Break the stalemate and gain a decisive victory. Hold your position in the Solomons.
In Santa Cruz, you will be defending your base against 25 waves of nothing but naval units, mostly larger well-armored ones, coming from the top center and top right portions of the map and heading to your base at the left. Good firing positions in this level are limited.
This guide will cover how to get a Full House, which is a perfect round with all medals and 20 victory points, on the Santa Cruz level of the iBomber Defense Pacific campaign, played on Veteran difficulty. In addition, this mission guide will cover the secondary objective and hidden target along with a walkthrough video.
Secondary Objective
Protecting the bridge is imperative to allied operations on Santa Cruz. Protect it at all costs.
There is a wooden bridge that connects the two main pieces of land in this level. It is relatively susceptible to enemy fire and can be destroyed quickly, but it’s made up of several sections, only some of which must be saved to complete this objective. Expect to lose half the bridge and try not to stress about this too much.
Supply Crates: 7
Victory Points So Far: 200
- Machine Gun lvl 3
X2 Power vs Flamed Specialization - Cannon lvl 3
- Bomb lvl 3
- Flamer lvl 3
- Comms lvl 3
- Rocket lvl 1
Perks used for this mission:
- Greenback II
- Iron Back II
- Special Delivery
Greenback, now at rank two, and Special Delivery will help considerably with funds for stronger defenses and covering the bridge at the same time. Ironback II is useful due to the considerable amount of damage put out by the enemy in this level and helps saves a ton of money on repairs, which can potentially short your defenses otherwise.
Hidden Target
The hidden target in Santa Cruz is pretty easy to find, considering there aren’t really any other structures in this map besides your base and the bridge, which you should absolutely not be dropping bombs anywhere near. I’m watching you . . .
Look on the eastern, larger piece of main land to find a pair of wooden structures hidden amongst some trees, which aren’t really hidden considering they are surrounded by an open field. It’s hard to tell which structure of the pair is the actual target; however, it is easy enough to hit both with one bomb.

Turret Placement

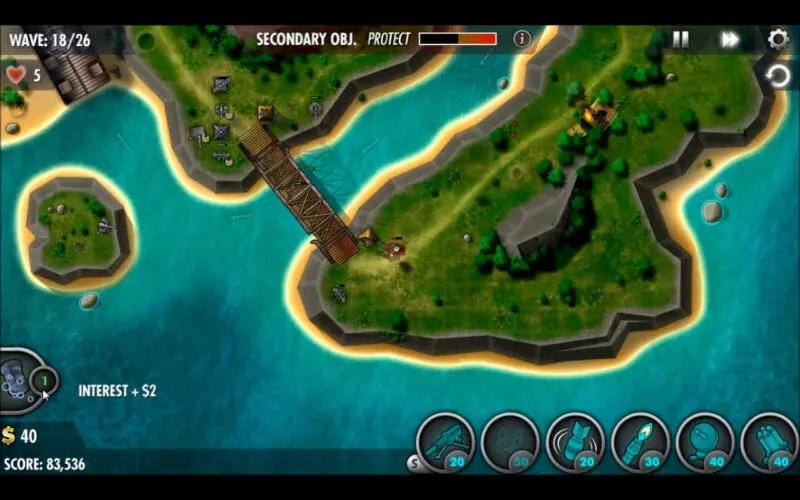
Wave 8 turret placement. Wave 18 turret placement.
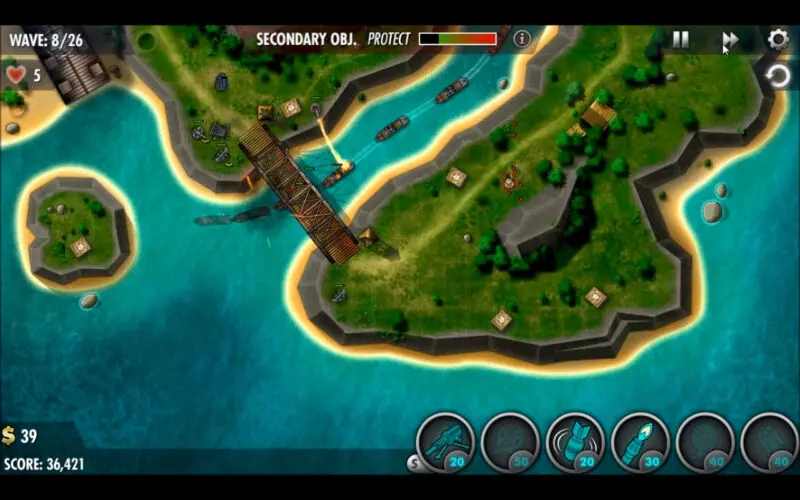
Turret placement will focus on making a strong show of force on the smaller island that is close to your base, with a bomb turret placed early to start working over the crates and occasionally taking out sneak attacks. Place a flamer to the right of the bridge to slow units coming from the shorter path, giving your other turrets more time to shoot them.
Funds will be limited, so you will end the mission with just a handful of upgraded turrets. Place 3 Cannons along the little bit of the merged path—the first couple on the right side of the small landmass and the third on the small island—so that the first two can make benefit of a Comms Tower that will boost most of that first group.
A single Machine Gun turret placed on the south side of the bridge will help protect your secondary objective while shooting up units coming from the longer path—although, like mentioned above, expect the bridge to still take a fair bit of rather unavoidable damage.
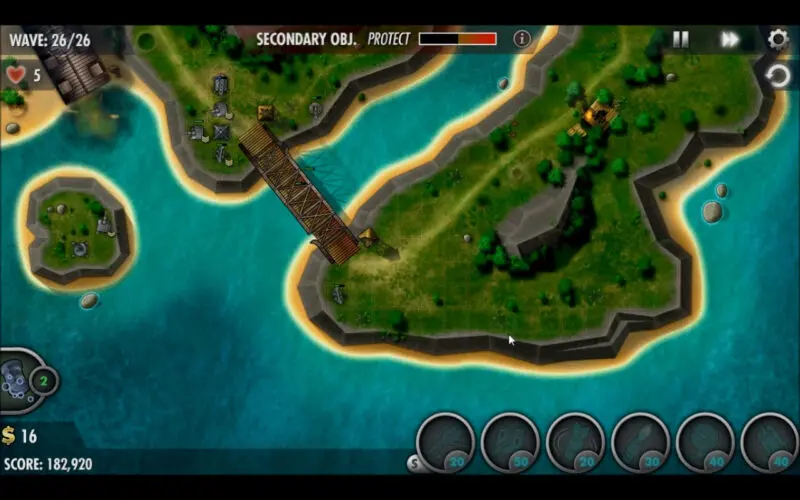
Wave 26 turret placement in Santa Cruz.
Veteran Difficulty Video Guide
Sharp Shooter Achievement
There is a special achievement in this mission, Sharp Shooter, which you can get by using only machine gun turrets. To see this performed, check the special video guide below.