Iwo Jima: Operation Detachment
Japanese forces on Iwo Jima are strong. You must defend our position.
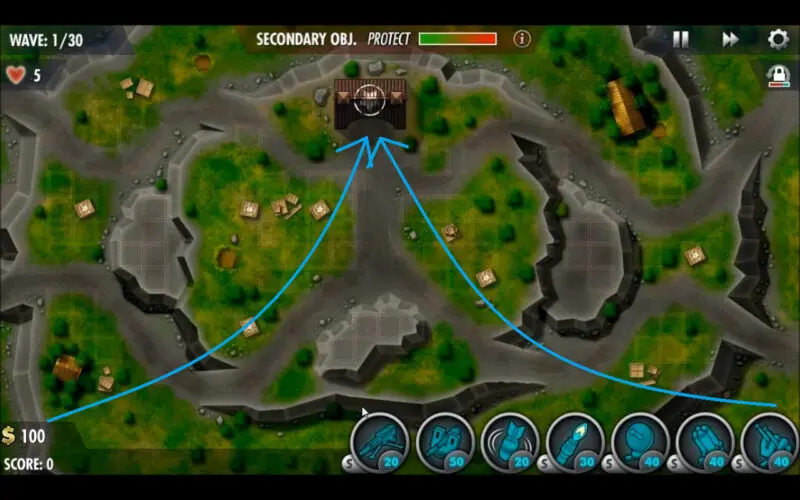
In this second-to-last level of the campaign, you will be presented with a whole new level of difficulty. Between the secondary objective, spread-out wave paths, and numerous tough enemies, strong micro-management skills and frequent use of the pause button are absolutely necessary. Here you will need to dig in most of your turrets and continually reposition them to fire on the enemy throughout the level.
This guide will cover how to get a Full House, which is a perfect round with all medals and 20 victory points, on the Iwo Jima level of the iBomber Defense Pacific campaign, played on Veteran difficulty. In addition, this mission guide will cover the secondary objective and hidden target along with a walkthrough video.
Secondary Objective
Ammunition is running low. Protect our remaining reserves.
As mentioned above, these weakly armored crates are a big challenge of this mission. They require you to not only spread out turret placement to a large degree in order to prevent them from being fired upon, but also to push strong weapons to the front lines in an effort to take out as many units as possible before they can even make it past the crates. Shielding these crates is difficult due to the enemy’s habits of firing at them even when you’ve built turrets as close to them as you can. To top it off, you really need at least four to survive, because if you have three and one of them is damaged to a noticeable degree, you will fail.
Supply Crates: 6
Victory Points So Far: 400
- Machine Gun lvl 3
X2 Power vs Flamed Specialization - Cannon lvl 3
- Bomb lvl 3
- Flamer lvl 3
Slower enemies specialization. - Comms lvl 3
Increased interest specialization - Rocket lvl 3
Faster rockets specialization - Anti-Air lvl 3
Comms boost specialization
Perks used for this mission:
- Ironback II
- Entrenched II
- Fast Fingers
Armor-ups are once again an economic issue in this level, not necessarily because of limited funds, but because of how spread out your defenses will need to be. The dig-in bonus and fire rate bonus also serve to offset having less guns to cover each path, giving them a pretty incredible damage output.
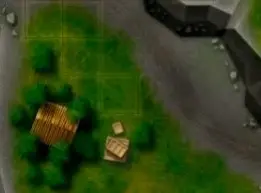
Hidden Target
The hidden target in Iwo Jima is placed almost mockingly, considering how hard it is already to defend the ammo crates; now you’ll have to avoid accidentally bombing them, too. Look for the small wooden shack located next to your Bomb icon and the bottom left supply crate. You can drop the bomb close to the grey land to the left and still take out the shack while leaving the crates unharmed.
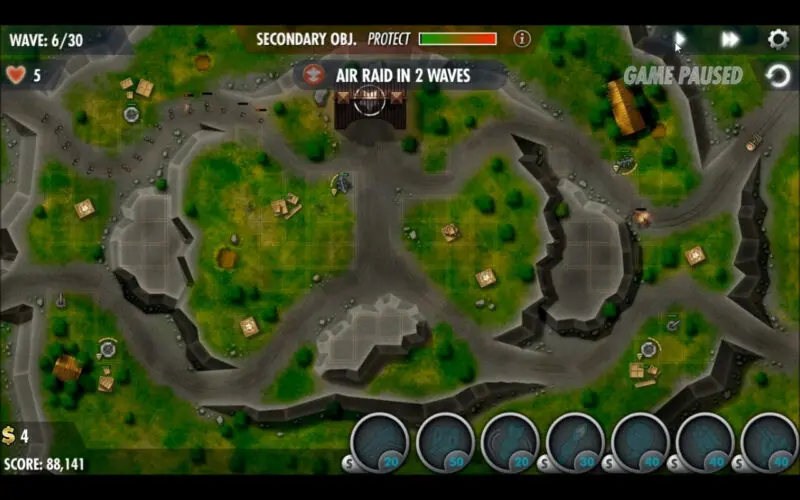
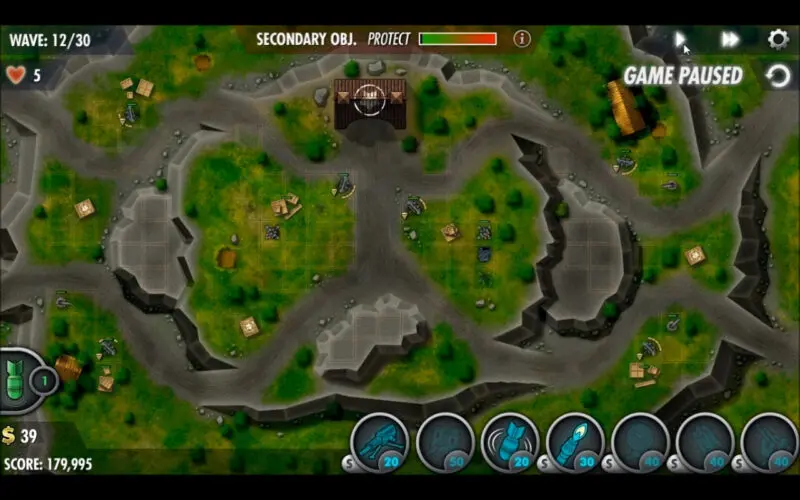
Turret Placement

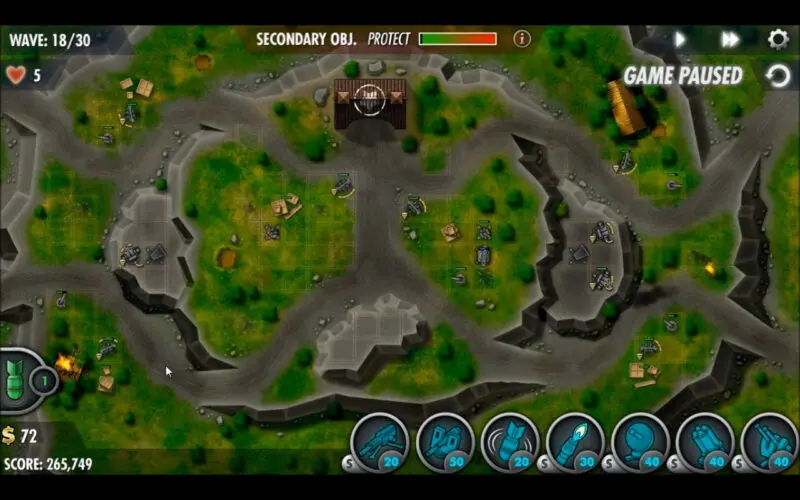
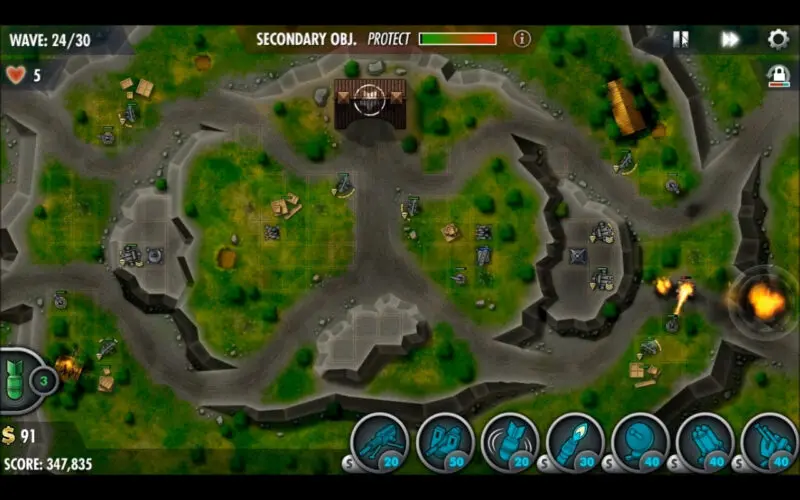
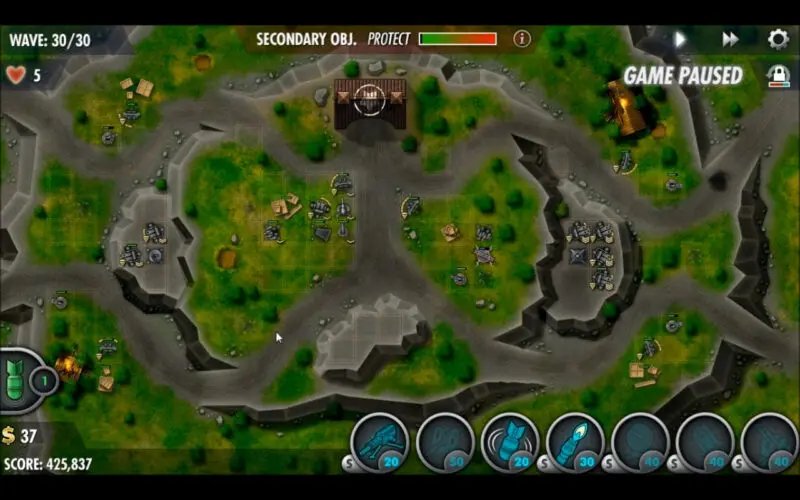
Wave 6 turret placement in Iwo Jima. Wave 12
In reality there is so much detail to this level that the video above is really the most accurate way of describing how to complete this level. However here are some general pointers to keep in mind in this level;
- You will need to dig in practically all of your turrets that you can do so with, pausing at the beginning of each wave to reposition as necessary, or during waves to cover potential leaks.
- Eventually you will have turrets that can reach almost every crate, so make sure not to waste bombs, or build a tower too early on, since you really need to have bombs saved to cover potential leaks that even your dug in turrets can’t stop, in particular the super fast tanks. If a fast tank looks like it will take a life, be sure to pause quick before it gets too close and drop the bomb a fair bit ahead of the tank, otherwise they may outrun it, or if too close to your base, take your life before the bomb falls.
- The four areas of building space by each of the crates near where the enemy enter the map, including the top right spot with the long hut, should be home to a flamer paired with a lvl 3 MG to weaken and slow incoming units. With the fire rate bonus, being dug in along with the bonus for that and having the x2 damage to flamed units, you will be pleasantly surprised just how powerful these cheap turrets can be, especially for the first half of the level.
- The two pieces of high ground that sit between the two right and two left paths are going to be your rocket bases, boosted with comms. Each should have 2 Rockets by the end so that each can cover one approach if both from that side are being used for a wave, or combined if only one of the two paths is being used that wave. IMPORTANT : Make sure you angle their fire arc so there is no green within a fair distance of the ammo crates at any time as your own Rockets will destroy the crates and can easily fail you the secondary. For this same reason, make sure you never have a Rocket turret that is not dug in, as you won’t be able to control the direction it fires in.
- Air is a pain in the ass in this level as the paths never converge where one turret can hit both. You will need one turret for each approach. The first air wave from the right comes at level 8, the first on the left at 10. The left one needs a lvl 2 upgrade at wave 18, right at level 20. Wave 24 should make level 3 for the right one (to be safe) and wave 26 for the left. I am specific here because the way the air waves come and accidentally spending too much money the wave before messed me up since even the rewind wouldn’t take me back to the point where I had enough money for the next upgrade or turret placed. If you slip up like I did, you will probably not be able to earn any money from killing ground units before the first plane takes a life from you with how fast they come in.
- Getting this level on perfect in Veteran is excruciatingly difficult (as it damn well should be), thus the new difficulty option in the poll. If you find yourself wanting to scream out in rage, take solace my friend in that you were not alone. Woosaah is the word of the day.
Wave 18 Wave 24 Wave 30