Kwajalein: Marshall Islands
Protect your position. This is a useful stepping stone in the island hopping route to mainland Japan.
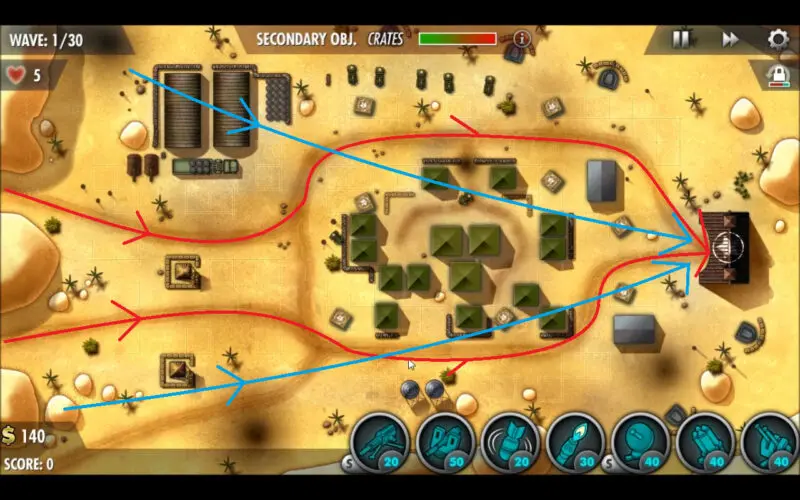
Here in Kwajalein, you will be protecting a desert base against two main paths of ground units that curve around the center of the map before heading to your base at the right, supported by a pair of air paths that curve in from the north and south. The majority of your ground-based defenses will be focused on the left side of the map, near where the enemies arrive.
This guide will cover how to get a Full House, which is a perfect round with all medals and 20 victory points, on the Kwajalein level of the iBomber Defense Pacific campaign, played on Veteran difficulty. In addition, this mission guide will cover the secondary objective and hidden target along with a walkthrough video.
Secondary Objective
Supplies have been scattered throughout our main camp on Kwajalein. Collect them all.
If you have been watching my video guides thus far, you know I make a habit of showing how to take out every crate in each mission, and this is no exception. The only complication comes from having to take care where bombs are dropped, considering crates are often placed in positions we need for turrets, but can’t wait to accrue the bombs first to place said turrets near or around these crates.
Supply Crates: 8
Victory Points So Far: 280
- Machine Gun lvl 3
X2 Power vs Flamed Specialization - Cannon lvl 3
- Bomb lvl 3
- Flamer lvl 3
- Comms lvl 3
Increased interest specialization - Rocket lvl 3
- Anti-Air lvl 3
Perks used for this mission:
- Greenback II
- Eagle Eye II
- Phantom Strike
This mission uses the same perk load-out as the last for the very same reasons. Many turrets need to be able to require new targets quickly as many of them will cover multiple paths at once, while extra range will make a considerable difference in creating excellent fire coverage zones.
Hidden Target
The hidden target in Operation Hailstone is the gray turret that is located at the top right corner of your build Rocket button of your heads-up display. It’s somewhat tricky, thanks to being partially obscured by the interface and with so many other buildings in this level.

Turret Placement

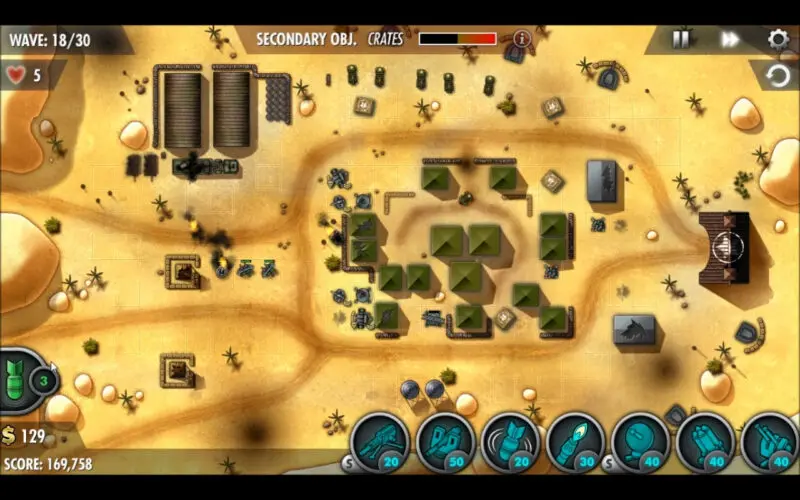
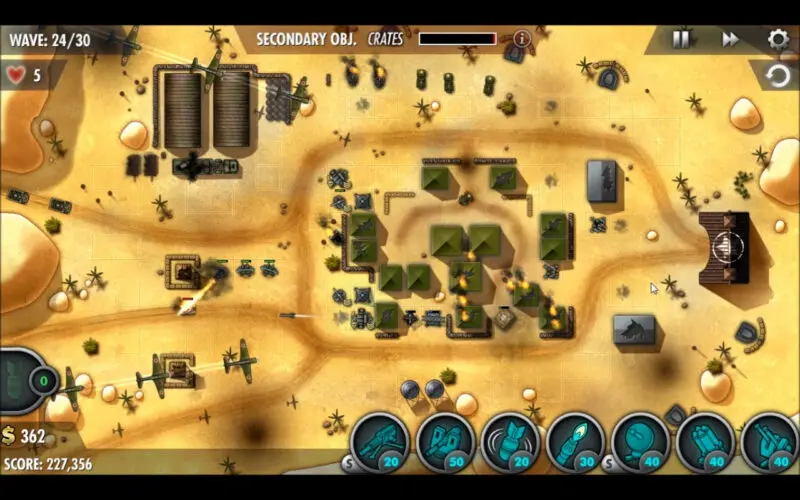
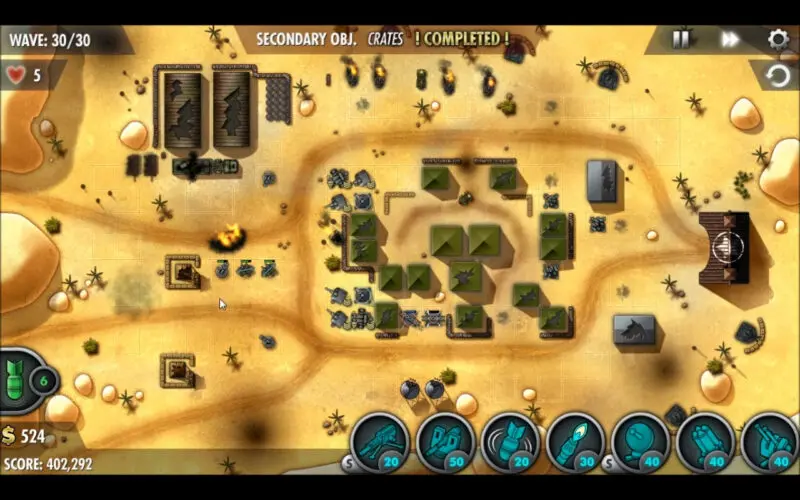
Wave 6 turret placement. Wave 12 turret placement.
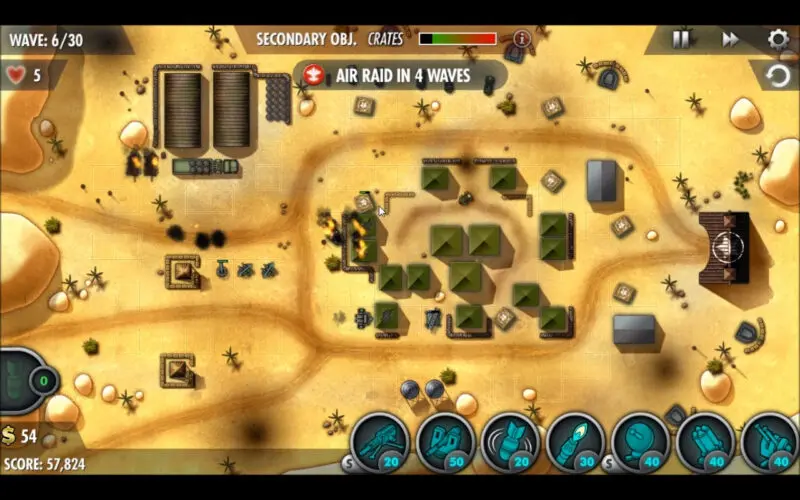
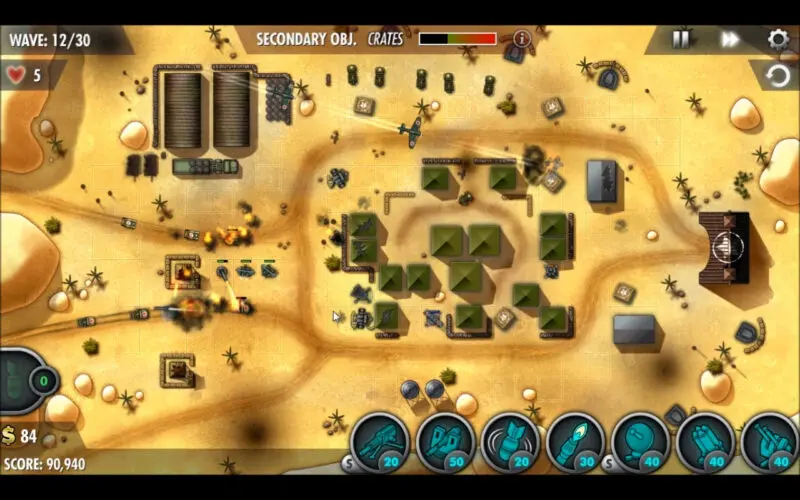
As mentioned above, turret placement in this level will focus on creating a strong overlapping field of fire for the two ground paths right at the start of their approach, since this is where they converge the best, providing the most overlapping arcs of fire combined with plentiful turret placement spots.
Your initial task should be building the strip of flamer and Machine Gun pairs on the set of 3 tiles that sit between the two paths. After this, build bomb turrets, some AA towards the rear of your base, and comms-boosted cannons and rockets on the two sets of four tiles that sit right where the paths first start to circle around the center of the map.
Rocket Turrets will do best if placed and dug in accordingly so they fire down the path of approach, and a trio of (eventually) fully upgraded AA turrets at the back will keep you protected throughout the mission. Make sure to check the pictures above for more specific details.
Wave 18 turret placement. Wave 24 Wave 30.